1 / Survey the finished wall
Record the substrate, finished dimensions, alignment, existing moisture concerns, services and access panels. Do not assume an adhesive or fixing pattern is suitable for every wall. A qualified installer should confirm the support and preparation required for the selected assembly.
2 / Agree a representative joint sample
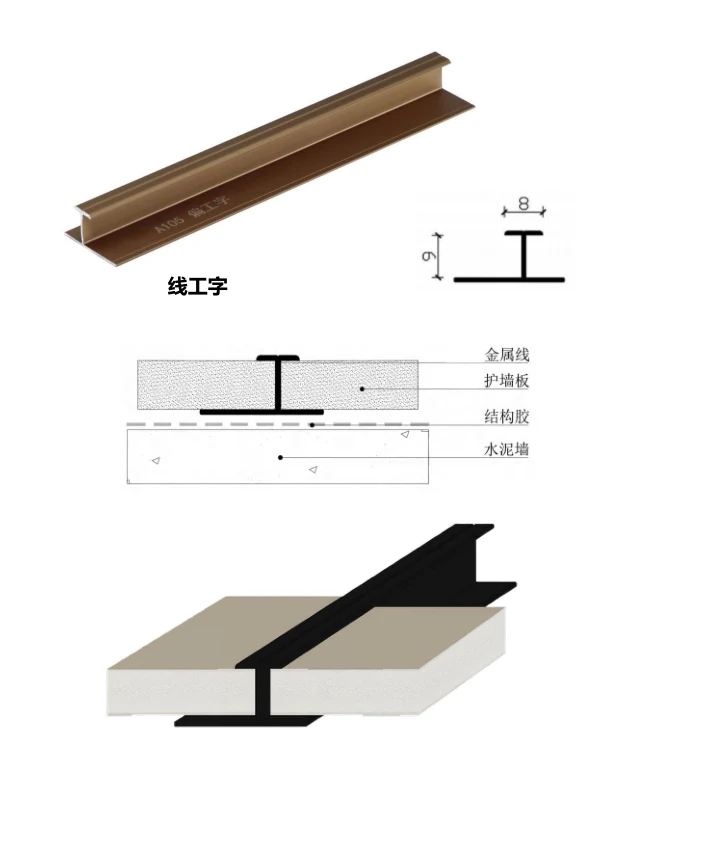
Review two panel edges with their actual connector and adjacent trim. Check grain direction, the front reveal and how the cut edge is covered. Confirm fastener type, spacing, movement allowances and substrate preparation in the installation documentation; no universal values are provided here.
3 / Resolve corners, openings and access
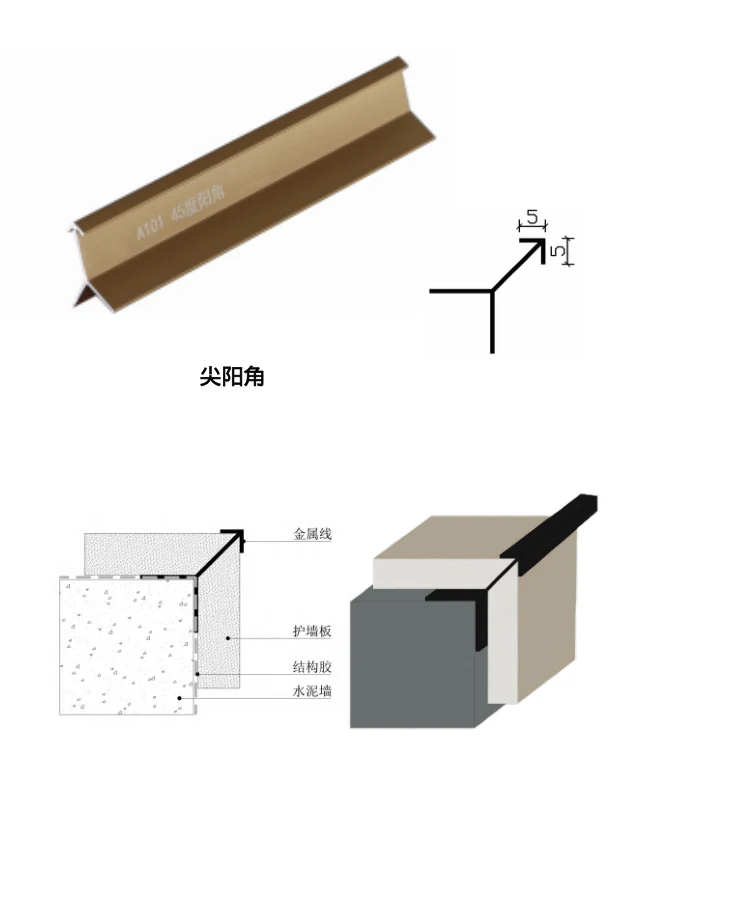
Mark internal/external corners, skirting, ceiling transitions and door reveals on the elevation. Keep electrical and maintenance access coordinated. Identify every trim by reference and required length. A decorative close joint must not be assumed to replace a required movement or building joint.
4 / Approve the sequence before bulk cutting
Confirm panel numbering, cutting responsibilities, connector quantities and the inspection hold point. Use the approved sample and drawing as the acceptance reference. This planning checklist is not a substitute for a product-specific installation manual.
Read the junction before ordering the trim
The profile matrix shows distinct joint, edge, corner and light-channel arrangements. Do not infer a universal gap, fixing spacing or adhesive specification from a catalog illustration. Request a coordinated drawing for the chosen wall build-up and a representative mock-up before site installation.